Post videos via Chrome/Firefox, with support for working sessions and connection configuration.
Browser Automation
Caption, hashtag và thông tin bài đăng
Viết hoặc chỉnh nội dung bằng AI
Dịch nội dung khi cần
Chia lịch đăng giữa các video
Thêm âm thanh hoặc gắn giỏ hàng khi cần
05
Track progress
Monitor processing status, posting schedules, and results in a centralized dashboard.
Dashboard
Monitor multiple accounts at once
Manage your posting schedule from one place
Auto-post based on your configuration
Render before posting
Built-in AI to edit captions in each channel's unique style
06
Theo dõi và chạy lại khi cần
Xem trạng thái, xử lý lỗi hoặc tiếp tục lấy nội dung mới từ nguồn theo dõi.
Xem video đang chờ, đang xử lý hoặc đã đăng
Kiểm tra lỗi theo từng công việc
Mở lại dự án để tiếp tục chạy
Tạo luồng theo dõi nguồn
Tự lấy video mới và đưa vào quy trình đăng
Key features
QUẢN LÝ VIDEO & TÀI KHOẢN
Thêm video từ file, thư mục, nhiều nền tảng
Quản lý tài khoản bằng hồ sơ trình duyệt riêng
Hỗ trợ Firefox, Chrome, GPM, GoLogin...
Phân nhóm tài khoản và gán proxy từng hồ sơ
XỬ LÝ & CHUẨN BỊ NỘI DUNG
Giữ nguyên video hoặc xử lý qua bản mẫu
Tạo bản mẫu kéo thả hoặc dùng FFmpeg
Viết lại, dịch caption bằng AI
Sửa nội dung, lịch đăng và các tùy chọn khác
ĐĂNG & THEO DÕI TỰ ĐỘNG
Chạy nhiều tài khoản trong cùng một dự án
Tải xuống → kết xuất → tải lên theo cấu hình
Theo dõi trạng thái và lỗi của từng video
Tạo luồng theo dõi, tự lấy video mới để đăng
How to use
Install & get started11 steps · step 10/11
Loading the DHB Upload TikTok interface…
Sign in to dhbtools.com with the account that bought DHB Upload TikTok.
Step 1/11Download the installer
Step 1/11
Download the installer
Get the latest version from your Account page.
Add TikTok accounts
Add proxies: If you use proxies, add them first. Open the Proxy tab, click Add proxy, choose Paste a list, then paste your proxies in the format shown in the box. Then click Check all proxies, and click Check. The software shows which proxies are alive, their country and their latency.
Create a new profile: Go to the Browser profiles tab, click Add profile, then choose Create a new profile. Pick a browser, name the profile, turn on Use proxy if you need it, and choose a group for the profile. The browser box only lists the browsers you turned on in General settings, on the Browser tab.
Log in to TikTok: Under Login method, you have two choices. Manual sign-in opens a browser so you can sign in yourself; then you just click Save and sign in. Automatic sign-in uses the username, password and two-factor code you entered, and only works with Firefox Portable, Chrome Portable or Chrome System. Once done, the profile changes to Logged in.
Add many accounts: If you have many accounts, choose Bulk sign in accounts. Paste the list into the box, one account per line, or switch to the TXT file or Excel file tab. The table reads it right away and points out any line in the wrong format. Accounts that TikTok asks to verify stop at Needs action, so you can finish them yourself.
Import existing profiles: If you already have profiles in GoLogin, GPM, Firefox or Chrome, choose Import existing profiles. The software scans them and lists the profiles that aren't in the table yet. Tick them, set a group and a proxy, then click Import.
Account groups: Click Account groups to sort your accounts by topic. Click Add Group and give it a name, then click Add account to pick accounts for the group. Later, you assign videos to a whole group instead of picking accounts one by one.
Music and cart: For a profile that already has a TikTok account, the Profile details panel has an Upload settings section. Turn on Add music to videos, or Add a cart to videos. To add a cart, your account must be signed in and already have a cart on TikTok. Each profile keeps its own settings.
Create a project & add videos
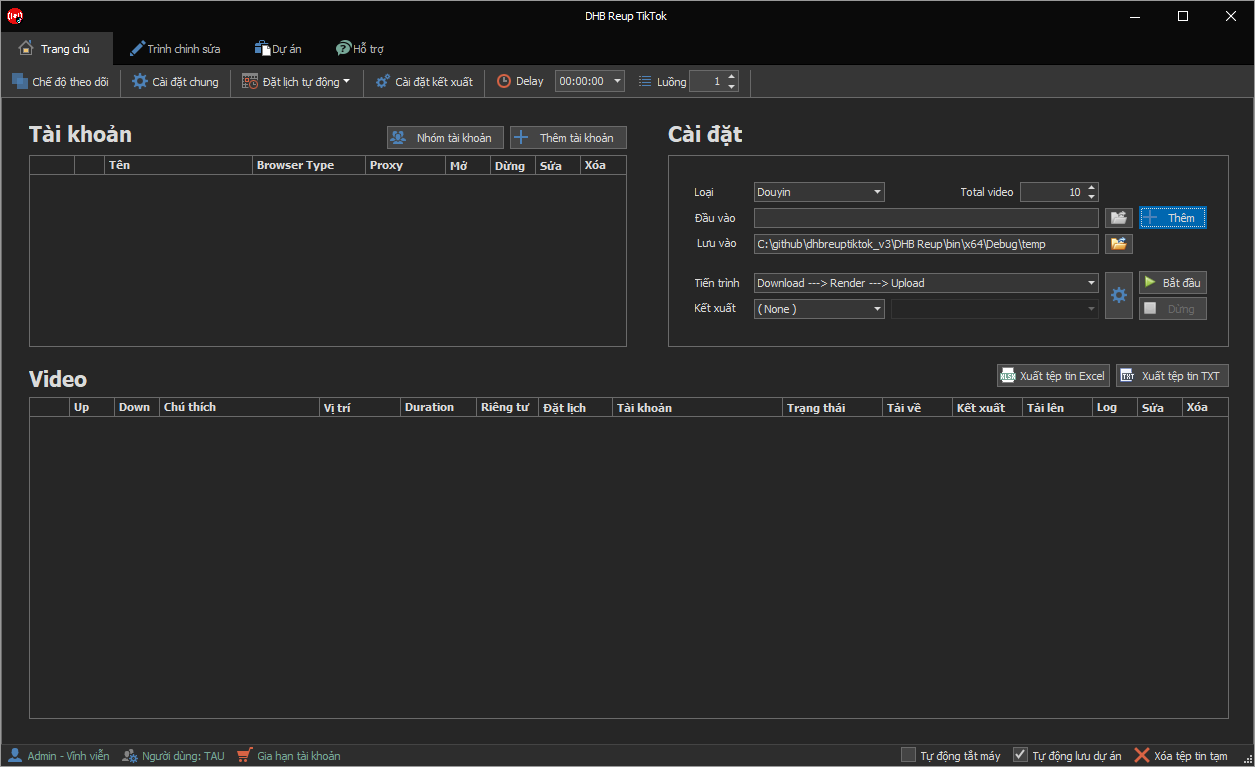
Create a project: On Home, click the blue New project tile. Name the project and pick a folder to save it in, then click New project. A project is usually one campaign or one group of channels.
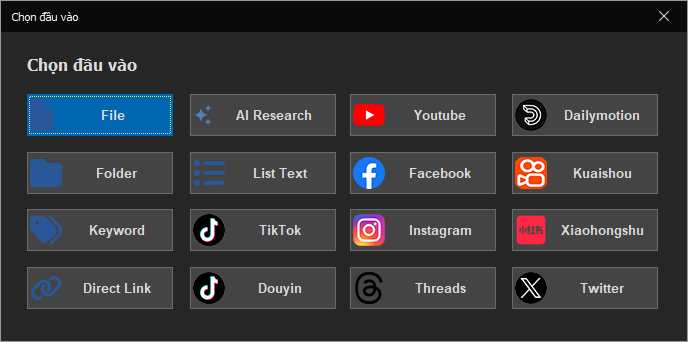
Add videos from your PC: Click Add videos. Click File or Folder in the row of buttons below to pick videos on your computer. The software only adds the videos directly inside that folder, not in its subfolders. You can also drag files straight into the video table.
Add videos by link: For videos already on your own channel, paste the links into the box, one link per line. Videos per channel limits how many videos are added from each channel link. Click Next: filters to choose the kind of video, for example short videos only or regular videos only, then click Add. Only post videos you own or have permission to use.
Read the video table: Each row in the table is one video, with its upload channel, privacy, schedule, music and cart. Click the channel or privacy cell to change it quickly. The three-part bar on the right shows whether a video is downloading, rendering or uploading.
Choose upload channels: Press Ctrl A to select every video, right-click, open Upload channel and pick an account or an account group. The whole batch gets its channel in one go. A video with no channel can't run yet.
Spread videos across channels: To spread videos evenly across several accounts, select two or more videos, right-click and open Distribute channels. It offers Spread across all accounts, Spread across account groups and Spread accounts within the group. Each account gets about the same number of videos.
Prepare your posts
Edit titles in bulk: Click Editor. The Edit title tab can add text at the start or end, replace text, and remove links and hashtags for the whole batch. The Input box can also number your videos, or pick one of several phrases at random. Click Run Process to see the result in the New title column, and if you like it, click Apply.
Translate and rewrite with AI: The Translate title tab translates titles into another language, with Google Translate built in and no key needed. The AI rewrite title tab rewrites the wording in your channel's own style. AI services use your own API key or subscription, turned on in General settings, so they may cost you money.
Privacy: In the right-click menu, Privacy offers Public, Private, Only me and Scheduled. When you schedule a video, its privacy switches to Scheduled on its own.
Bulk schedule: Click Bulk schedule. Choose By day or Fixed daily times. Set the start date, the number of videos per day and the time window. The software spreads them evenly, and the summary line shows the date the schedule runs until. A schedule must be between 20 minutes and 29 days from now. Pick the time zone that matches your account.
Cart and music: Cart & music in the right-click menu attaches products or picks music for the selected videos. Keep your product list ready in Manage cart products, on the profile's card.
Edit one video: Click the pencil button at the end of a row, or Edit video in the right-click menu, to view and adjust one video before it is posted.
Run & monitor
Choose the process: In the Project settings column, the Process box decides how far the software goes. Download only prepares the videos. Download then Render stops before posting, so you can review them. Adding Upload posts them straight to TikTok.
Choose how to render: The next box chooses how each video is processed. No render keeps the video as it is. Encodec re-encodes the video. Template applies a design you have made. ffmpeg Code runs your own command. DHB Render sends the video to the DHB Render software, to translate it, add a voice-over or apply an advanced template. The Preset box below picks the exact template to use. See the template guide to learn how to make a template.
Threads and delay: Threads is the number of videos that run at the same time. Delay, next to it, is the break between two videos. Start with a few threads, then add more while the computer stays stable.
Advanced settings: The Advanced tab has Upload mode, Browser window, Shorten videos, a limit on videos per run, and auto-delete for downloaded videos. The browser window can show normally, line up in a grid, or move off the screen. Be careful with Delete originals too, because the original files will no longer be on your computer.
Start posting: Click the blue Start button in the bottom corner. Each video's three-part bar fills in turn. If any video has no channel yet, the software tells you right away and doesn't start, so you can fix it. Click Stop when you need to; the software asks before it stops.
Errors and logs: A video that fails shows red text right in the table. Click the first button at the end of the row to see that video's log. Once fixed, right-click and choose Run this video to run just that video again.
Run several projects: To run several projects, click Run several projects on Home. Click Add projects to pick the projects to run, then set How to run to One by one or At the same time. Projects that are already done are skipped. A project with videos that have no channel reports an error and stops the projects waiting behind it, unless you turn on Skip failed projects, keep going.
Render templates
Use a starter template: In the Render settings tab, Samples has templates you can use right away, like a vertical 9:16 frame with a blurred background or a corner logo. Click a template to copy it to your account, then open the designer to edit it.
Create a new template: Click Create Template, then choose Drag & Drop to design visually, or ffmpeg Code if you write your own command. With Drag & Drop, name the template, then in the Layout step choose the size mode and the aspect ratio. Click Create.
Design with drag and drop: The designer has the library on the left, the stage in the middle, and the Layers and Properties panels on the right. Drag an Image on as a logo, drag Text to add a title, and drag effects onto each layer. Click Preview to try it out. Your template is saved automatically as you work.
Apply a template to a project: Back in your project, set the render box to Template, then pick your new template in the Preset box. Every video in the project will follow this template.
Independent render: Turn on Independent render if you want a different style for each video. Each row gets its own Render and Preset boxes, and the two boxes in the Project settings column are hidden.
Connect DHB Render
Open the DHB Upload connection tab: In DHB Render, the DHB Upload connection tab lets DHB Render work together with the DHB Upload apps. For example DHB Upload TikTok, DHB Upload Facebook or DHB Upload YouTube.
Start the server: Click the Start server button on the right. The server only accepts connections from this computer, so both apps need to be installed on the same machine.
Connect from DHB Upload TikTok: Open DHB Upload TikTok and enter your username and password. Then click Login. Open the Render settings tab, and under On this machine, click DHB Render. The software connects to DHB Render on its own. When the list of DHB Render templates appears, the two apps are connected. DHB Render also shows DHB Upload TikTok in its list of connected clients.
Create a project, add videos: On the Home tab of DHB Upload TikTok, click New project. Name the project, then click New project. The new project has no videos yet. Click Add videos, then click File to pick videos on your computer. For videos already on your own channel, paste the links into the box, one link per line. Click Add, and the videos appear in the table with thumbnails.
Choose DHB Render and a channel: In Project settings, set Render to DHB Render. Click the Preset box, and the list that opens is the templates from DHB Render. Choose the video localization template. Press Ctrl A to select every video, right-click, open Upload channel and pick a TikTok channel. The whole batch gets its channel in one go.
Run and follow along: Click Start to run. DHB Upload TikTok prepares the video, then sends it to DHB Render. DHB Render applies the template, translates the video and adds a voice-over. When it's done, DHB Render sends the finished video back to DHB Upload TikTok. Finally, DHB Upload TikTok posts the video to the TikTok channel you picked.
Monitor Mode
What Monitor Mode does: Monitor Mode helps you share your own content without doing it by hand. For example, whenever your YouTube channel has a new video, the software processes it and posts it to your TikTok account.
Set the source: Click Add Thread. Name the thread, then paste your channel links into the Link box, one link per line. The software accepts YouTube, Facebook and TikTok channels, and counts the valid links. Each link has a start point, for example From now on, so only videos posted after it are processed.
Choose where to post: In Upload Page, choose one account or an account group. For a group, Distribution in group lets you pick All accounts, Rotate or Random. Then choose the privacy for the videos.
Set the scan schedule: Scan schedule sets how often the channel is checked, for example every 30 minutes. Keep the interval reasonable. Turn on Advanced settings if you need to limit the active hours. Then the posting pace lets you set the videos per day and the gap between two videos.
Connections and video processing: Connections shows which platforms need an API key or a cookie, depending on the links you pasted. Video processing sets the render type for this thread's videos. Click Add thread to finish.
Run and follow threads: Click Run on the thread card. The card shows the next scan, the number of videos posted and the number of errors. The Queue button at the top of the tab shows the videos waiting to be processed, and the Log button lets you review each run.
The Channel Monitoring feature lets you add monitoring streams, automatically scan for new content from platforms such as YouTube, TikTok, and Facebook, then publishing it based on your preset configuration.
Cách lấy cookie TikTok (get cookie) trên Chrome: nhấn F12, mở tab Network, tải lại trang rồi chép dòng cookie trong Request Headers để dán vào DHB Upload.
DHB software currently supports HMCaptcha,AchiCaptcha and will support more third-party Captcha API services in the future, giving you more flexible and diverse options.
Save
TikTok now supports attaching a shopping cart to products uploaded through the website. This article will guide you through the setup steps to attach a shopping cart to your video.
Note: Currently, if you post a video with an attached product
You can now choose from multiple browsers when using DHB Upload TikTok, without switching back and forth between ticks. Below is a step-by-step guide to adding an account.
Currently, the proxy formats supported for TikTok are IPV4 / HTTPS/HTTP/SOCKS5. Please note that if you purchase IPV6 proxies on your own and add them to the software expecting them to connect, we are not responsible.
Thê
Updates
3.27414/05/2026Latest
3.27414/05/2026Latest
DHB Upload TikTok v3.274
NewImproved source link detection
3.27309/05/2026
3.27309/05/2026
DHB Upload TikTok v3.273
PerfImproved source-video processing
3.27229/04/2026
3.27229/04/2026
DHB Upload TikTok v3.272
PerfImproved source-video processing
3.27118/04/2026
3.27118/04/2026
DHB Upload TikTok v3.271
PerfImproved upload tagging
PerfImproved account selection
FAQ
Frequently asked questions
Can't find your question?Ask our support team in chat.
DHB Upload TikTok is a Windows tool that posts videos and photo posts to TikTok in bulk, for multiple accounts, organized by project. It drives a real browser to open TikTok Studio, select the files, fill in the caption, set privacy and publish for you, for content you own or are licensed to use. Results depend on your account, network and TikTok's current rules.
It can post videos and multi-image photo posts to TikTok. Each post can have its own caption, hashtags, @mentions and privacy setting.
See the pricing table on this page for plans and prices; every plan has all features and differs only in duration. The page does not mention a trial, so if you want to ask before buying, message us on the fanpage facebook.com/dhbtools.
The software runs on 64-bit Windows 10 or 11. Because each channel opens a real browser, more threads use more RAM and CPU; start with a few threads, see what your machine handles, then increase gradually (up to 30 threads).
No manual setup of the bundled parts: the installer includes Firefox Portable and Chrome Portable, and installs .NET 10 and WebView2 automatically if they are missing. The installer is on the Account page at dhbtools.com after you buy.
Create a browser profile for the channel (Firefox Portable, Chrome Portable, Chrome System, Chromium, or import from GoLogin or GPMLogin) and log in to TikTok in that profile, or add the channel with a cookie. Each channel lives in its own profile; no login method is guaranteed completely safe, so use your own account and keep the login stable.
Log in to tiktok.com in Chrome, open F12 > Network > Doc, press F5, pick the first request, go to Headers > Request Headers and copy the value of the cookie line (a long string containing sessionid=). In the software, add an account, choose Cookie as the login source, paste it into the Cookie field and save. Do not log out of that browser after copying, and never share the cookie with anyone.
Yes, you can schedule each video or set schedules in bulk by day, time and videos per day. The time must be at least 20 minutes from now and at most 29 days ahead, a limit set by TikTok; leave the schedule empty to post immediately.
Yes. Add videos from files, folders or links to the project table, split the video count across channels, then run; set the thread count (1 to 30) and the delay between videos. Too many simultaneous threads strain your machine and can trigger TikTok's posting-too-fast warning, so increase gradually.
The software only posts through TikTok Studio using a real browser and does not affect views; we cannot say why views are low because distribution is decided by TikTok. Check the notices and account status in TikTok, review your content, captions and the software's posting log, and use a separate profile and proxy per channel.
Yes, when you open the software you sign in with the dhbtools.com account you bought with, and your expiry date shows in the status bar. This account is separate from the TikTok accounts you post with.
Yes. You can paste a list or import from a TXT or Excel (.xlsx) file, and the table flags lines with the wrong format. For cookies, each line uses the form Channel name|Cookie|Proxy type|Proxy, and the proxy part can be left empty.
Yes, but only for profiles that use Chrome Portable, Chrome System or Firefox Portable; for other browsers you open the profile and log in manually. If TikTok asks for extra verification, the account moves to the Cần xử lý (needs attention) status so you can finish it.
You can add files or folders on your computer, drag and drop into the table, or paste several video links at once. Only use content that is yours or that you have the right to use.
In each project you choose how far to run: download only, download then render (stopping so you can review), or run all the way to uploading to TikTok. Rendering is the step that processes the video with a template or an ffmpeg command before posting.
Enter the caption with hashtags and @mentions for each post and the software picks the matching TikTok suggestions. Privacy can be Public, Friends, Private, Only me or Scheduled; captions are limited to 2,200 characters and any excess is trimmed automatically.
Yes. The caption editor can translate with Google Translate (no key needed) or AI, and rewrite with OpenAI, Gemini or DeepSeek using your own API key entered in Settings, AI tab. You can also use the {a|b|c} spin syntax to create several caption variants.
Yes. In the Render step you can keep the video as is, re-encode it, apply a template (for example a vertical 9:16 frame with a blurred background, a corner logo or text) or run your own ffmpeg command; the drag-and-drop template designer has a preview. You can also trim videos and turn on independent rendering so each video uses its own style.
Yes if your TikTok account has a cart: log in the channel, tick the cart option so the software scans the products already there, then assign products to videos. You can also add music to a post, random or from your favorites; the software cannot guarantee a sound is free of copyright issues, and you are responsible for your posts.
Monitoring mode lets you create flows that watch YouTube, Facebook or TikTok channel links whose content you have the right to use. When a new video appears, the software processes it and posts it to the account or group you chose, following the scan frequency, active hours and posting pace you set.
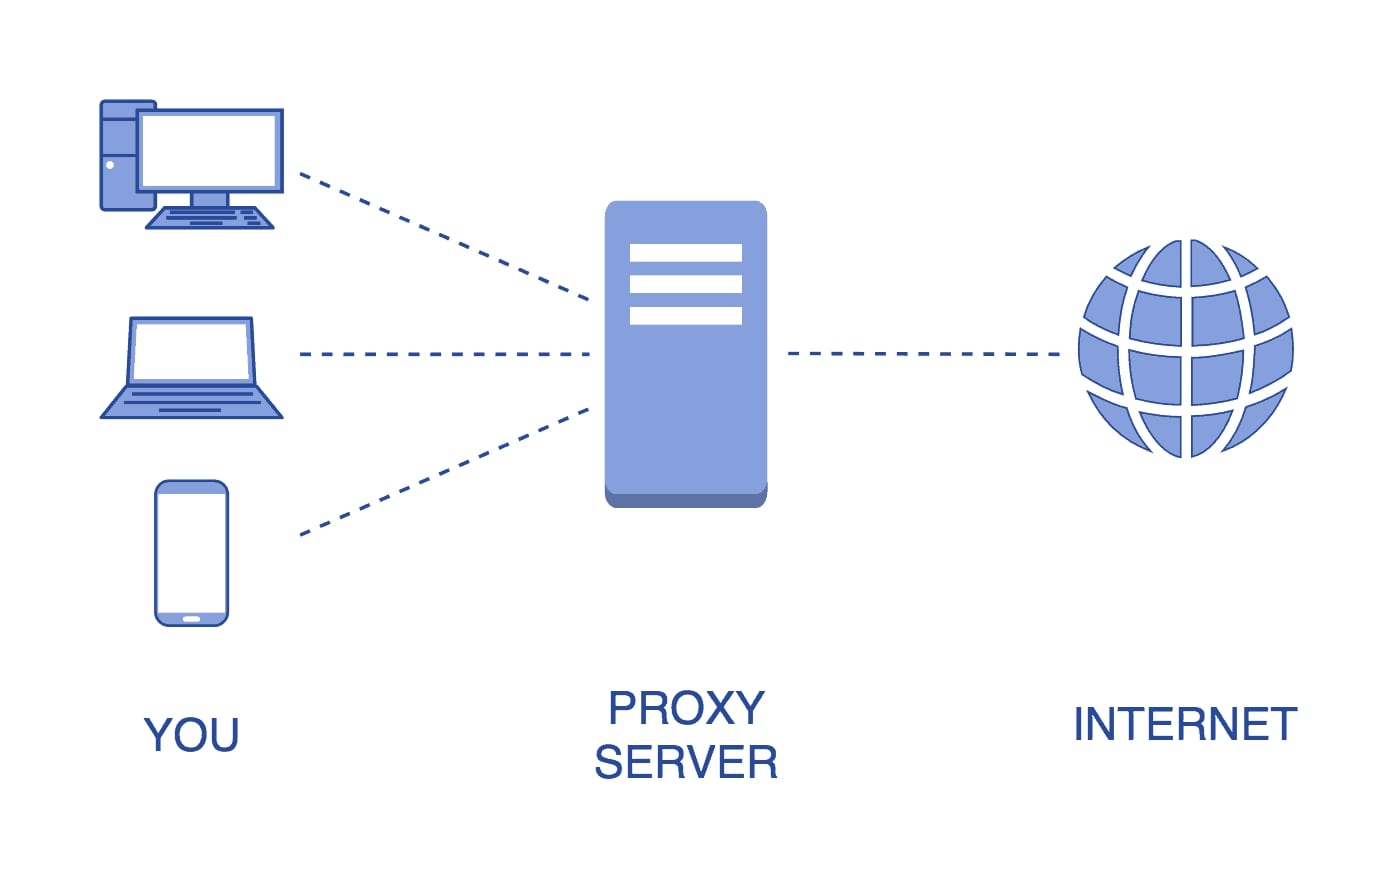
Yes, each channel profile has its own proxy, and the software has a proxy store for HTTP and SOCKS5 where you can check alive or dead status, country and latency, then assign proxies to channels. You supply good proxies yourself; slow or dead proxies can make uploads fail midway.
Enter them as IP:Port:User:Pass, or IP:Port if the proxy uses IP whitelisting. The software supports only IPv4 proxies, not IPv6, and you should use one clean proxy per channel, or as few channels per proxy as possible.
Nothing guarantees it, since TikTok decides, but you should use one profile and one proxy per channel, avoid bursts, space posts out and keep the thread count moderate. Prefer your own content, vary captions, and watch the log so you can stop in time when a posting-too-fast warning appears.
Add your HMCaptcha or AchiCaptcha API key in Settings, Captcha tab; the software tries the keys from top to bottom and skips any that are out of balance or wrong. You top up the balance yourself, and if funds run out or the key is wrong that post reports an error; solving is not guaranteed to succeed every time.
The software notes that accounts added by cookie often get captchas when posting videos and it cannot skip captchas, so you should add a captcha-solving service key or use a browser profile logged in directly. When entering a cookie list, remove the User-Agent part if the cookie has one attached.
That is TikTok's posting-too-fast warning: reduce the thread count, increase the delay between videos, and let the channel rest for a while before running again. The software keeps a separate error log for each video so you can see the cause.
Get a new cookie and paste it again, or reopen the browser profile and log in to TikTok again. A cookie stops working if you log out, change your password or TikTok forces a re-login.
Failed videos show in red in the table, have their own log so you can see the cause, and can be re-run one by one. When running several projects, there is an option to skip a failed project so the rest continue.
Yes. In the project's Advanced tab, the Browser window option lets you show windows normally, tile them in a grid, or move them off-screen; this moves them off-screen rather than running headless. While a project hides the browser, the OutOfMemory fix in general Settings has no effect on that project.