DHB Stream Pro - Guide to Using the Screen Recording Feature
Hello everyone! This article will guide you through using the screen recording feature in the DHB Stream Pro tool
First, to record your screen, you need to install the "Screen-recorder-devices.exe" software included in the tool folder

After successfully installing "Screen-recorder-devices.exe", the next step is to work inside the tool
If you do not have the tool yet, please contact
http://m.me/dhbtools
https://dhbtools.com/
https://www.facebook.com/dhbtools
to purchase it hehe
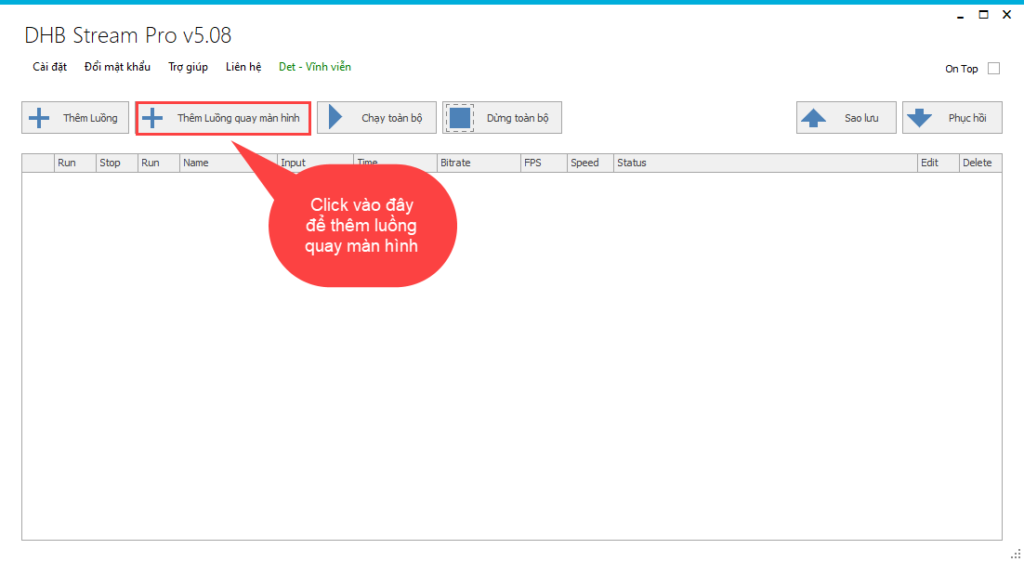
First, open the tool
On the main interface, select "Add screen recording stream" and the tool will display the settings section for the screen recording stream
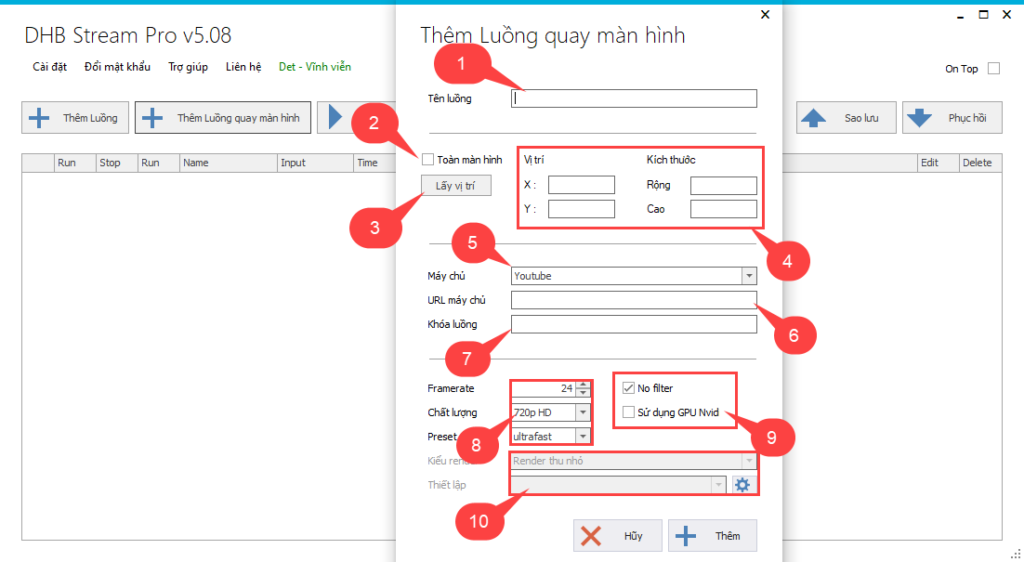
(1) You can enter any stream name you like, as long as it is easy to remember and distinguish
(2) Check the full-screen option and the tool will record the entire screen
(3) Select the position picker option and the tool will help you choose the area to record on the screen. Note: drag from left to right and from top to bottom!
(4) After capturing the screen position, your selected area will be shown in the position section, where you can edit it again or manually add the dimensions
(5) The server is not limited by the tool; as long as you have a stream key, the tool can go live
(6) For the server URL, the tool supports default URL options for Youtube and Facebook. If you want to live stream to other servers, you can enter the server URL
(7) When creating a live stream, you will be provided with a stream key to add to the tool; simply copy and paste it into the tool and you are done
(8) This section supports adjusting video quality ( 720 HD, 1080 HD, ... )
(9) Render ( Filter )
- If you check No filter, the tool will live stream without Render
- If you uncheck No filter, the tool will live stream and Render at the same time ( the live stream will be heavier )
- If you use an Nvidia graphics card, you can check the option to use Nvidia GPU
(10) Settings Render
- You can choose from the Render options supported by the tool
- Select the gear icon to adjust the Render settings to your preference
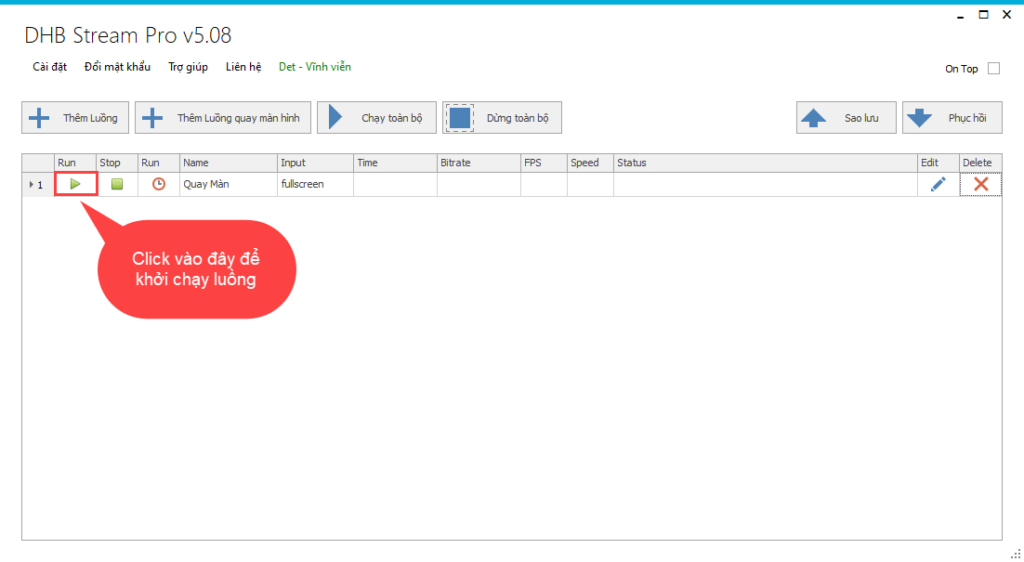
After finishing the stream settings, the stream will appear on the main page; click Run to start the stream
For the buttons on the stream, I have already explained them in the tool usage guide, so please review it to understand the tool more clearly
https://dhbtools.com/huong-dan/huong-dan-su-dung-tool-dhb-stream-pro/
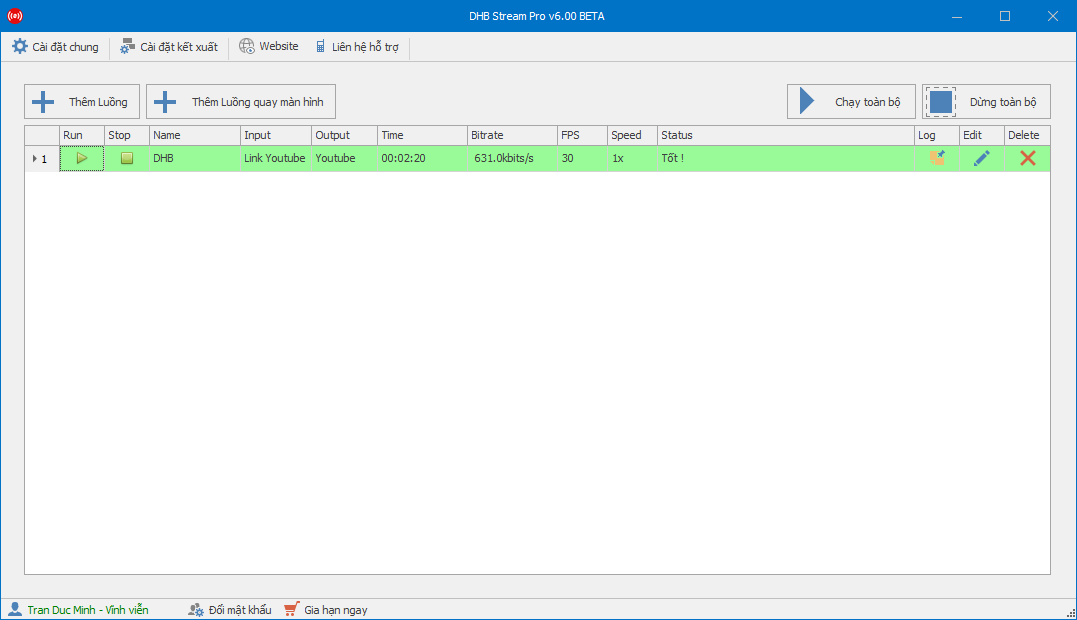
After starting the stream, here is the result

Wishing you success!
For any questions, please contact us through our website and fanpage
https://dhbtools.com/
http://m.me/dhbtools
https://www.facebook.com/dhbtools
Bình luận
Chưa có bình luận nào. Hãy là người đầu tiên!
Hướng dẫn sử dụng phần mềm DHB Stream Pro V6
Trong bài viết này mình sẽ hướng dẫn Live với nền tảng Youtube. Các nền tảng khác có khóa luồng thì các bạn làm tương tự nhé. Bước 1: Thực hiện thêm luồng để bắt đầu Live- Tạo luồng Live và lấy kh
Read more →
Hướng dẫn Livestream đa luồng Youtube với DHB Stream Pro
Như các bạn đã biết hiện nay chúng ta không thể live nhiều luồng với nền tảng Youtube bằng cách cũ nên bài này mình sẽ hướng dẫn các bạn tạo nhiều luồng live Youtube, lưu ý bài viết này dành cho các
Read more →
Huớng dẫn sử dụng chức năng hẹn giờ DHB Stream Facebook
Hiện tại 1 số bạn vẫn chưa hiểu rõ nguyên lí hoạt động của chức năng đặt lịch nên bài này sẽ hướng dẫn các bạn đặt lịch 1 cách cụ thể Khi các bạn tạo luồng mới hoặc sửa luồng thì các bạn có thể đặ
Read more →
Hướng dẫn đăng chéo trang và nhóm trên DHB Stream Facebook
Bài viết này mình sẽ hướng dẫn các bạn sử dụng chức năng đăng chéo phần mềm DHB Facebook Live Bước 1: Các bạn cần có luồng đã Live sẵn bằng phần mềm DHB Facebook Live trước đế sử dụng chức năng nà
Read more →