How to Create a VPN to Fake IP with OpenVPN and a Vultr VPS
Hello everyone! In this article, I’ll guide you through creating a VPN with a Vultr VPS.
First: Go to the website https://www.vultr.com/. Then log in.
Next, select Products and click the plus sign + as shown in the image.

Next, choose the server you want to rent, then select Ubuntu 18.08 x64.
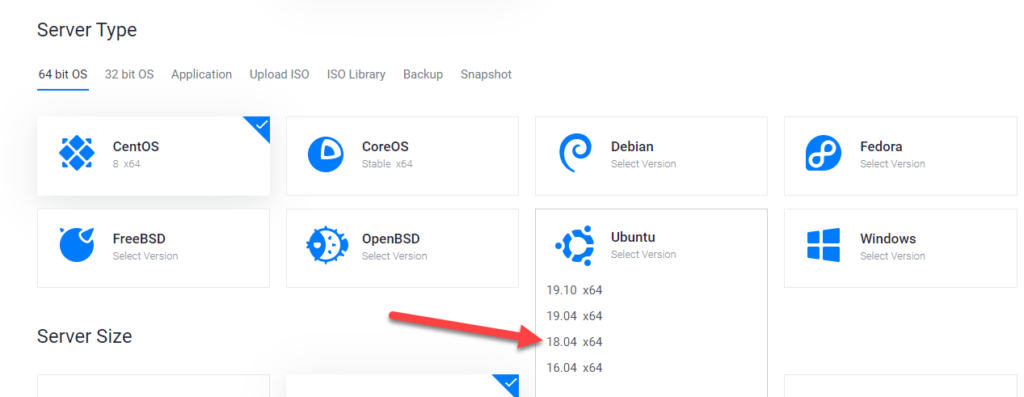
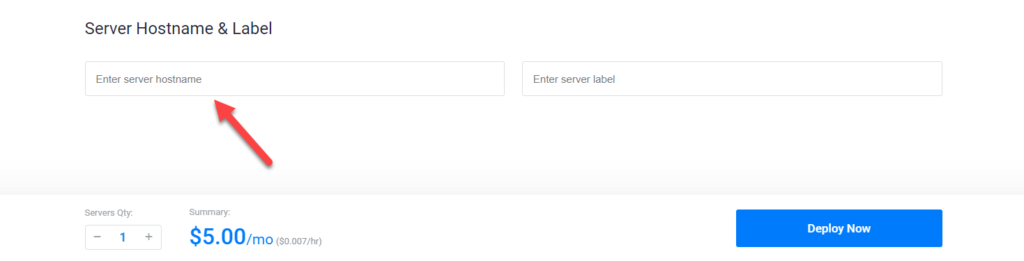
Next, scroll down to the naming section. Enter a name, then click Deloy now to start renting it.
Note: I recommend that if you are using it as a server, the $5 plan is enough. ^^
Result: If it appears like this, it means you have rented it successfully.

Next, to export the file, you need to download OpenVPN and Bitvise SSH Client.
Bitvise SSH Client download link: Download Now!
OpenVPN download link: Download Now!
After downloading, extract the files and open Bitvise SSH Client first.
The interface will look like this.
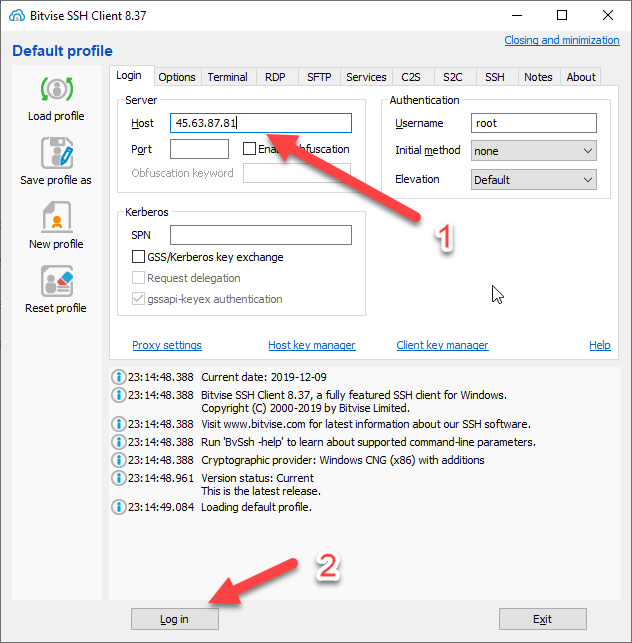
For the Host field, go back to the server you just rented. Double-click it to display the information panel.

To enter it in Bitvise, copy the IP Address, paste it into Host, then click Login.
After logging in, it will appear like this:
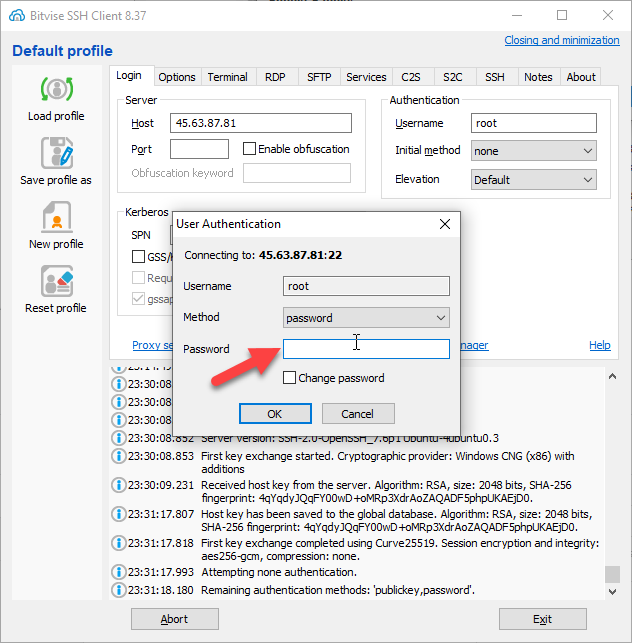
Enter the Password. To get the Password, use the Vultr server you rented, in the same section where the IP Address is shown.
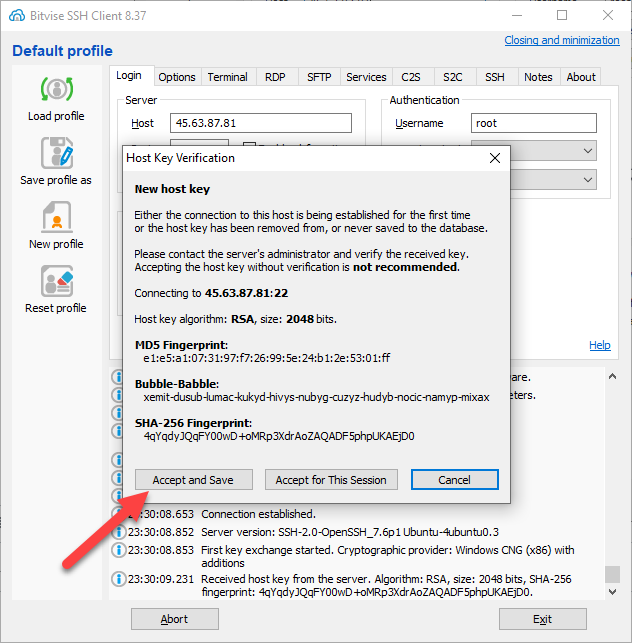
Select Accept and Save!
After that, a black root window will appear. Copy the command below, paste it in, and press Enter.
wget https://git.io/vpn -O openvpn-install.sh && bash openvpn-install.sh
Copy the command above into it and press Enter.
It will show a panel like this.

In this step, press number 1.

Next, enter 1194.
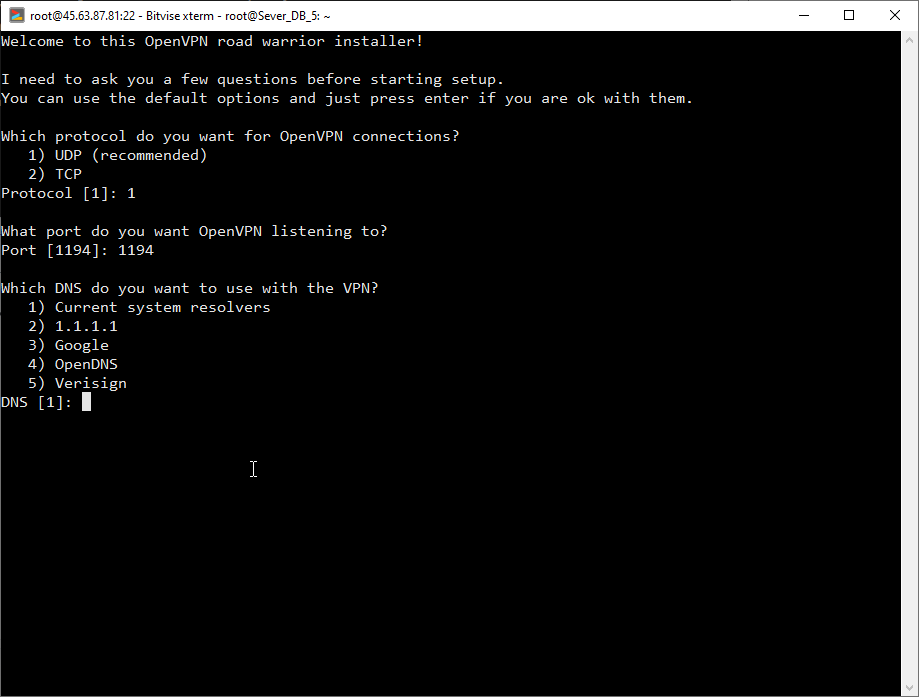
Next, press number 1, Current system resolvers.
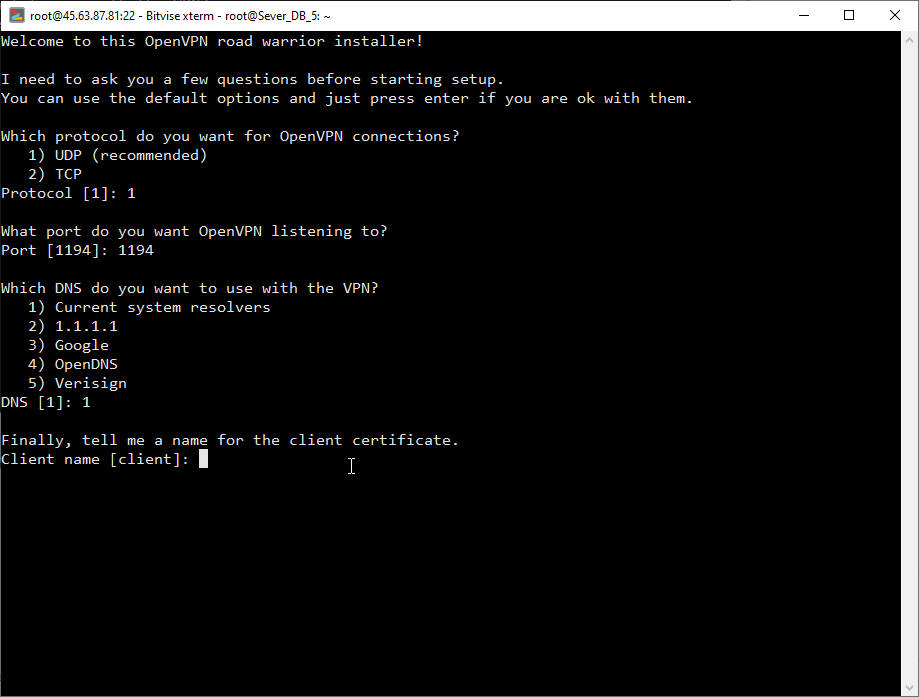
In this final step, enter a name, then press any key and it will automatically generate the file.
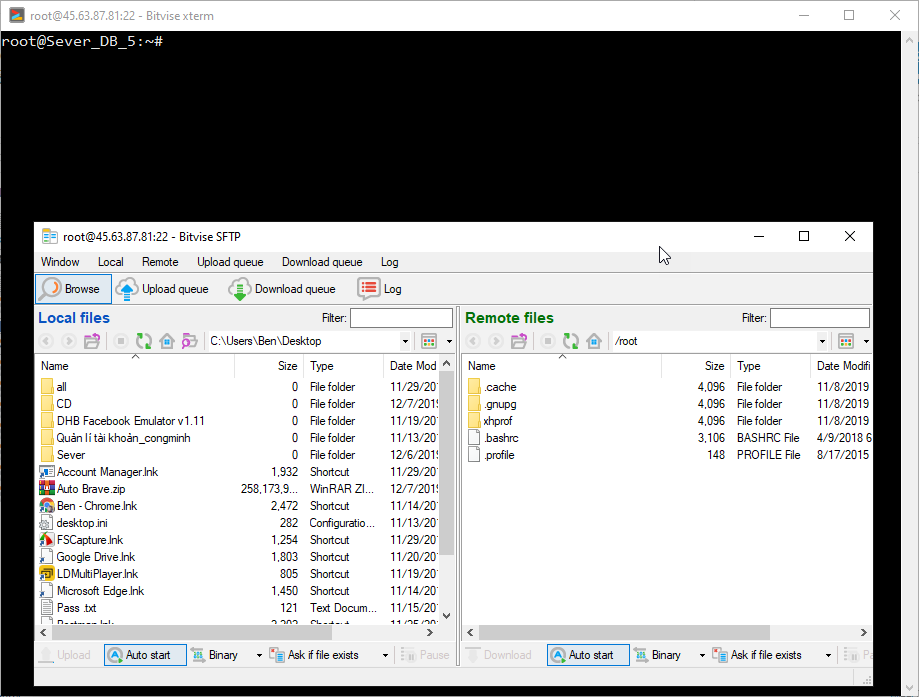
When this panel appears, it means the setup is successful. Click the spinning button on the right, which means Refresh, and the file will appear. Then drag it to the main screen.
After that, open the OpenVPN you downloaded earlier.
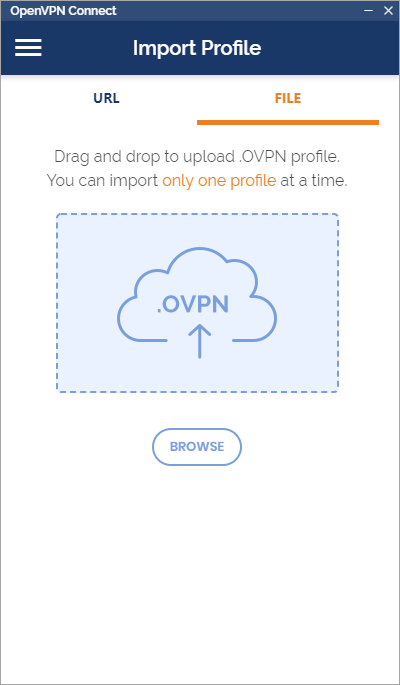
Here is the OpenVPN interface. Click the file section, then drag the file exported from Bitvise directly into it.
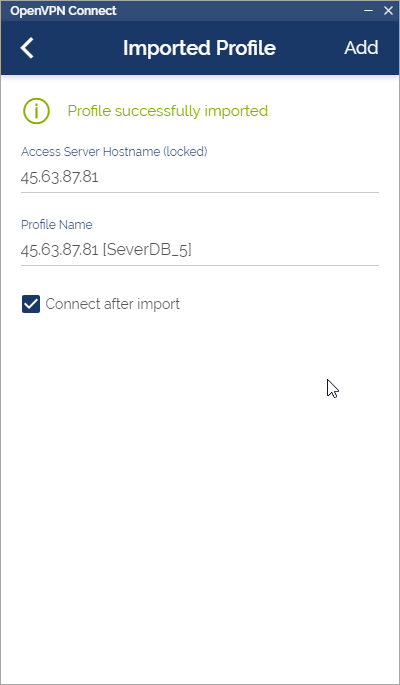
When this notification appears, click ADD in the right corner.
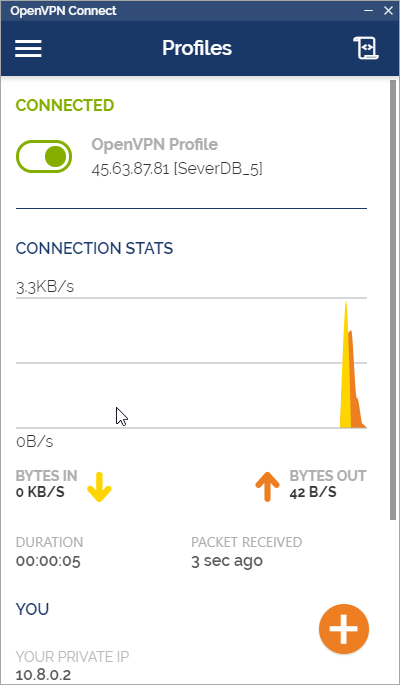
When it shows Connected like this, it means the setup is successful. If you have any questions, please contact: https://www.facebook.com/dhbtools/
Thank you!
Bình luận
Chưa có bình luận nào. Hãy là người đầu tiên!

Hướng Dẫn Lấy API Google Drive v3
Google Drive API v3 giúp bạn kết nối ứng dụng, website hoặc phần mềm với Google Drive để lấy thông tin file, kiểm tra file, đọc danh sách file hoặc xử lý dữ liệu từ Drive.
Read more →
DHB Cookie Inspector – Extension miễn phí
DHB Cookie Inspector là một tiện ích mở rộng trình duyệt miễn phí, mã nguồn mở, được phát triển nhằm hỗ trợ người dùng kiểm tra nhanh cookie và một số token Facebook phục vụ mục đích học tập, kiểm thử, debug và quản lý phiên đăng nhập cá nhân.
Read more →
Hướng dẫn chi tiết chức năng chỉnh sửa văn bản trong phần mềm DHB
Trong quá trình upload hoặc quản lý video, việc chỉnh sửa hàng loạt tiêu đề, mô tả, thẻ… là rất quan trọng. Phần mềm DHB hỗ trợ công cụ Trình chỉnh sửa văn bản với nhiều thao tác nhanh chóng, tiết kiệm
Read more →
Hướng dẫn nạp tiền và lấy API các Model AI
Trí tuệ nhân tạo đang phát triển mạnh mẽ với nhiều nền tảng khác nhau. OpenAI, Gemini và DeepSeek là ba nền tảng AI nổi bật cung cấp API mạnh mẽ cho phép nhà phát triển tích hợp các mô hình ngôn ngữ
Read more →